Grasshopper Voronoi 3D: This comprehensive resource unlocks the secrets of this powerful plugin, empowering you to generate stunning cellular patterns and unleash your creative potential. Master the art of defining points, crafting intricate diagrams, and transforming them into mesmerizing 3D forms.
Whether you’re an architect, designer, artist, or simply fascinated by algorithmic beauty, this guide is your key to unlocking the endless possibilities of Grasshopper Voronoi 3D. Get ready to push the boundaries of design and explore a universe of organic complexity!
Table of Contents
What is Grasshopper Voronoi 3d?
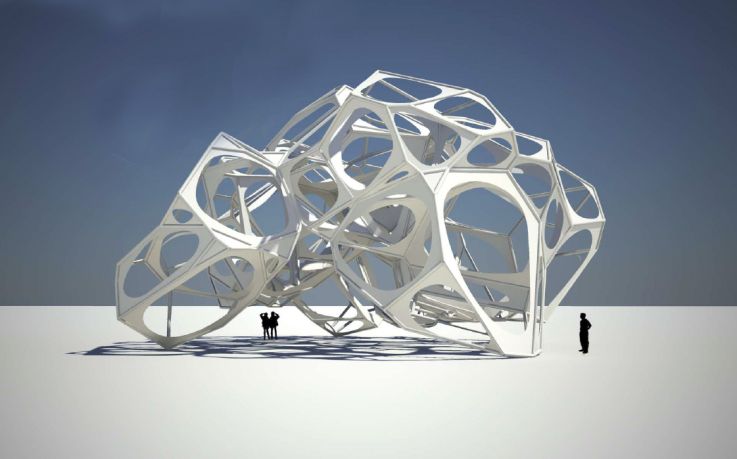
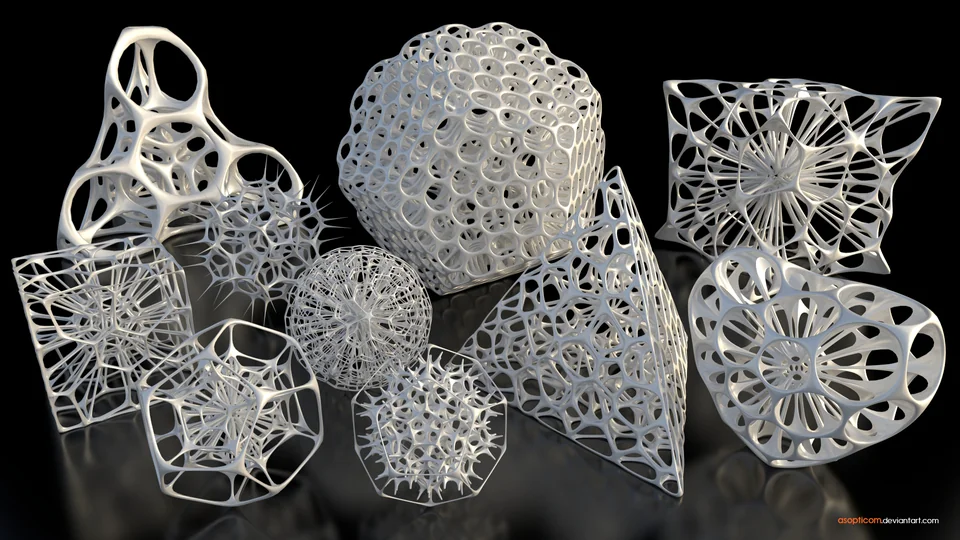
Grasshopper Voronoi 3D is a generative design tool used to create organic, cellular patterns in 3D space. It is a plugin for the Rhinoceros 3D modeling software that utilizes the mathematical concept of Voronoi diagrams to generate these patterns.
Here’s how it works:
- Points: You start by defining a set of points in 3D space. These points act as seeds for the Voronoi cells.
- Diagram: The Grasshopper then creates a Voronoi diagram based on these points. This diagram divides space into regions, where each region is closer to one seed point than any other.
- Cells: The regions of the Voronoi diagram are then converted into 3D cells. These cells can be meshed or rendered to create a variety of visual effects.
The resulting patterns can be complex and unpredictable, yet they often exhibit a natural beauty and order. Grasshopper Voronoi 3D is a powerful tool for architects, designers, and artists who want to create unique and organic forms.
Here are some of the things you can do with Grasshopper Voronoi 3D:
- Create complex 3D models for 3D printing or CNC machining.
- Generate realistic textures for architectural or product design.
- Create unique and eye-catching visual effects for animation or motion graphics.
- Explore the mathematical properties of Voronoi diagrams.
What’s the role of Grasshopper Voronoi in Parametric Design?
In Parametric Design, Grasshopper Voronoi 3D plays a critical role in generating organic, adaptable, and data-driven forms. Here’s a breakdown of its key contributions:
Organic Forms: Voronoi diagrams inherently create unpredictable and natural-looking patterns. This organic aesthetic contrasts with rigid geometric shapes, offering designers exciting avenues for exploration in architecture, product design, and art.
Adaptability: The power of parametric design lies in its ability to modify based on input parameters. In Grasshopper Voronoi, modifying the point distribution, boundaries, or cell properties dynamically changes the resulting form, allowing for iterative exploration and optimization.
Data-Driven Design: Voronoi cells directly respond to their seed points, effectively translating data points into tangible geometry. This enables designers to use real-world data, such as sensor readings or population density, to inform the design process, creating forms that directly respond to their environment.
Beyond these core functions, Grasshopper Voronoi provides additional benefits:
- Efficiency: Quickly generates complex geometries, saving time and effort compared to manual modeling.
- Uniqueness: Creates one-of-a-kind patterns due to the inherent randomness of Voronoi diagrams.
- Versatility: Applicable across various design domains, from architectural facades to furniture design and 3D printing models.
In essence, Grasshopper Voronoi unlocks a world of organic, data-driven, and adaptable design possibilities, making it a valuable tool for any designer embracing the principles of parametric design.

How to use Grasshopper Voronoi for 3D printing?
Here’s how you can use Grasshopper Voronoi for 3D printing:
1. Define your points:
- Start by defining a set of points in 3D space. These points will act as the seeds for your Voronoi cells. You can use various methods to define points, such as grids, random distributions, or existing geometry.
- Consider the desired density of your Voronoi pattern and the size of your 3D printer bed when choosing the number and distribution of points.
2. Create the Voronoi diagram:
- Use the “Voronoi 3D” component in Grasshopper to generate a Voronoi diagram based on your points.
- You can adjust parameters like the boundary conditions (box, sphere, etc.) to control the overall shape of the Voronoi structure.
3. Convert to a printable mesh:
- Use meshing components like “MeshBrep” or “Subdivide Surface” to convert the Voronoi diagram into a watertight mesh suitable for 3D printing.
- Pay attention to the mesh resolution and ensure it meets your printer’s requirements for minimum feature size and wall thickness.
4. Optimize for printing:
- Analyze the mesh for potential issues like overhangs or thin walls that might cause printing problems.
- Use tools like “Thicken” or “Bridge” components to address these issues and ensure a successful print.
- Consider using support structures if needed for complex overhangs.
5. Prepare for printing:
- Export your final mesh in a widely compatible format like STL.
- Slice the model in your preferred slicer software, adjusting settings like infill density and layer height based on your material and desired print quality.
- Print your Voronoi creation!
Additional tips:
- Explore advanced Voronoi components like “Dendro” or “Peacock” for more intricate and organic patterns.
- Utilize plugins like “Weaverbird” to further manipulate and refine the Voronoi cells for specific design goals.
- Remember to calibrate your printer and use appropriate filament settings for optimal results.
By following these steps and exploring the diverse capabilities of Grasshopper Voronoi, you can unlock unique and exciting possibilities for 3D printing organic and data-driven designs!
How to generate textures with Grasshopper Voronoi?
Generating textures with Grasshopper Voronoi requires a slightly different approach than creating 3D objects. Here’s a breakdown:
1. Define your points:
- Similarly to 3D printing, distribute points in 2D space. Consider using grids, random distributions, or existing curves to define the point pattern.
- Ensure the point density matches your desired texture resolution. More points create finer details but can increase computational costs.
2. Create the Voronoi diagram:
- Use the “Voronoi” component to generate the diagram based on your 2D points.
- Boundary conditions like “Plane” or “Rectangle” restrict the diagram to a flat surface.
3. Extract cell properties:
- Instead of converting to a mesh, utilize cell properties like centroid locations or cell areas.
- Utilize components like “Area” or “Surface Closest Point” to extract these values.
4. Map properties to texture parameters:
- Connect the extracted cell properties to parameters controlling your desired texture attributes.
- For instance, cell areas can control opacity, centroid locations can create displacement maps or multiple properties can be combined for complex effects.
5. Generate the texture:
- Use components like “Image Sampler” or “Gradient” to create your texture based on the mapped properties.
- Adjust color palettes, gradients, and noise functions to achieve the desired visual effect.
Additional tips:
- Combine Voronoi with other plugins like “MeshGradient” or “ParametricTexture” for even more sophisticated textural effects.
- Utilize color mapping components like “RemapRange” to control the range and distribution of texture values.
- Experiment with different point distributions and properties to explore diverse textural possibilities.
Remember, generating textures relies on extracting and manipulating data, rather than creating meshes. By creatively mapping Voronoi cell properties to texture parameters, you can unlock an expansive range of unique and organic textures for your design projects.

How to modify the point distribution with Grasshopper Voronoi? [code]
Modifying the point distribution is a crucial aspect of manipulating the outcome of Grasshopper Voronoi, allowing you to control the resulting pattern and complexity. Here are several ways to achieve this:
1. Manipulating Point Geometry:
- Explicit Point Positioning: Manually place points using point attractors or coordinates to create specific patterns or gradients in density.
- Curves and Surfaces: Convert curves or surfaces into points using “Explode” or “Surface Curve” components. This creates patterns influenced by the original geometry’s shape and flow.
- Points on Brep/Mesh: Distribute points directly on existing 3D Breps or meshes using “PointsOnBrep” or “Sample Points on Mesh” components. This allows the point distribution to adapt to complex surfaces.
// Create a grid of points
PointGrid grid = new PointGrid(5, 5);
List<Point3d> points = grid.GetPoints();

// Modify individual point positions
points[0] = new Point3d(10, 20, 30); // Move the first point

// Generate Voronoi diagram
Voronoi3D voronoi = new Voronoi3D();
voronoi.Points = points;
List<Brep> cells = voronoi.GetCells();
2. Algorithmic Control:
- Attractors and Repellors: Use “Attractor” and “Repeller” components to influence point distribution based on specific locations or geometry. This creates patterns attracted to or repelled from defined areas.
- Force Fields: Utilize “Field Force” components to apply directional forces on points, resulting in patterns that flow or clump around the force field’s influence.
- Noise Functions: Employ “Noise” or “Perlin Noise” components to introduce randomness and variation into the point distribution, generating organic and unpredictable patterns.
// Attract points towards a specific point
Attractor attractor = new Attractor(new Point3d(50, 50, 50));
List<Point3d> points = ... // Your existing point distribution

// Update each point based on attractor force
foreach (Point3d point in points)
{
  point = attractor.Attract(point, 0.1); // Adjust strength with the factor
}

// Generate Voronoi diagram
Voronoi3D voronoi = new Voronoi3D();
voronoi.Points = points;
List<Brep> cells = voronoi.GetCells();
3. Data-Driven Points:
- External Data: Import external data files (e.g., CSV, Excel) containing point coordinates or attributes. This allows you to use real-world data to directly affect the point distribution.
- Parametric Equations: Define custom parametric equations to generate points based on mathematical formulas. This offers precise control over point arrangement and spacing.
- Generative Components: Utilize plugins like “Lunchbox” or “Human” that offer specific components for generating point clouds with controlled density and distribution.
// Read points from a CSV file
List<Point3d> points = CSV.ReadPoints("points.csv");

// Generate Voronoi diagram
Voronoi3D voronoi = new Voronoi3D();
voronoi.Points = points;
List<Brep> cells = voronoi.GetCells();
4. Advanced Techniques:
- Voronoi Relaxation: Use the “Relax Voronoi” component to iteratively adjust point positions for more uniform or optimized Voronoi cells.
- Particle Systems: Explore plugins like “Kangaroo” for simulating particle dynamics with collision and attraction rules, resulting in emergent point distributions.
- Custom Scripting: Write custom Python or C# scripts to define complex point generation algorithms and logic within Grasshopper itself.
Remember that these methods can be combined and layered to achieve intricate and unique point distributions, ultimately shaping the character and outcome of your Voronoi patterns. Experiment freely and explore the vast possibilities offered by these different approaches.
// Relax Voronoi diagram for more uniform cells
RelaxVoronoi relax = new RelaxVoronoi(cells, 10); // Number of iterations
cells = relax.Relax();

// Simulate point dynamics with Kangaroo
KangarooSolver solver = new KangarooSolver();
List<Mass> points = ... // Your point masses

// Define attraction rules between points
foreach (Mass p1 in points)
{
  foreach (Mass p2 in points)
  {
    solver.AddSpring(p1, p2, 1.0, 10.0); // Spring constant and rest distance
  }
}

// Solve the system and update point positions
solver.Solve();

// Generate Voronoi diagram based on updated points
Voronoi3D voronoi = new Voronoi3D();
voronoi.Points = points.Select(m => m.Position).ToList();
List<Brep> cells = voronoi.GetCells();
3 types of Grasshopper Voronoi 3D diagrams
Grasshopper Voronoi 3D offers incredible flexibility in generating diverse patterns, making it difficult to limit them to just three types. However, there are three distinct approaches you can take to create different kinds of Voronoi 3D diagrams:
1. Organic and Naturalistic:
- Point Distribution: Utilize noise functions, attractors based on organic shapes, or points on natural surfaces like terrains.
- Cell Properties: Explore rounded edges, varying cell sizes, or color gradients based on cell properties for a more organic feel.
- Output Style: Render with soft materials, organic textures, and natural lighting to enhance the aesthetic.
Example: Generate Voronoi cells where point distribution is influenced by wind force acting on a tree canopy, creating organic, flowing patterns.
2. Parametric and Algorithmic:
- Point Distribution: Define points using parametric equations, data analysis, or custom algorithms for precise control and exploration.
- Cell Properties: Utilize formulas or data mapping to control cell size, color, transparency, or other properties based on specific parameters.
- Output Style: Render with clean lines, geometric textures, and focused lighting to emphasize the algorithmic nature.
Example: Generate Voronoi cells where point distribution follows a spiral pattern based on the Fibonacci sequence, resulting in a mathematically inspired design.
3. Hybrid and Multi-Layered:
- Combine different approaches: Overlay organic point distributions with parametric cell properties or layer multiple Voronoi diagrams with varying parameters for depth and complexity.
- Utilize external data: Use real-world data like sensor readings or population density to influence point distribution or cell properties, creating data-driven designs.
- Explore advanced techniques: Experiment with particle simulations, custom scripting, or Voronoi relaxation for unexpected and intricate patterns.
Example: Generate a Voronoi structure where point distribution reflects local wind patterns while cell size corresponds to ambient sound levels, creating a dynamic and responsive design.
Remember, these are just starting points. With Grasshopper Voronoi 3D, the possibilities are endless! Experiment, combine different approaches, and explore the vast design space to create unique and stunning 3D patterns.
How to use MeshBrep for Grasshopper Voronoi 3D?
MeshBrep is a crucial component in utilizing Grasshopper Voronoi 3D to create tangible objects or further manipulate the generated forms. Here’s how you can use it effectively:
1. Generate your Voronoi Diagram:
First, use the “Voronoi 3D” component to generate your desired Voronoi pattern based on your chosen point distribution and boundary conditions. Ensure you have a complete and watertight diagram for further processing.
2. Convert to Mesh:
Connect the output of the “Voronoi 3D” component to the “MeshBrep” component. This converts the diagram’s edges and faces into a triangulated mesh, which is essential for most downstream operations like 3D printing, rendering, or further analysis.
3. Control Mesh Quality:
Several key parameters within “MeshBrep” influence the quality and usability of your mesh:
- Mesh Tolerance: This controls the maximum edge length variation, affecting both detail and computational efficiency. Lower values create finer meshes but can increase processing time.
- Minimum Edge Length: Sets the minimum allowed edge length, preventing degenerate triangles and ensuring overall mesh integrity.
- Maximum Angle: Limits the maximum angle between adjacent faces, impacting surface smoothness and potential self-intersections.
4. Additional Considerations:
- Closed Breps: Ensure your final mesh is a closed Brep, which means it has no open edges or holes. This is important for many downstream applications like 3D printing or solid modeling operations.
- Mesh Optimization: If necessary, consider further refining your mesh using additional components like “Simplify Mesh” or “MeshReduce” to optimize its size and complexity without sacrificing accuracy.
- Material Properties: For 3D printing, assign appropriate material properties (e.g., thickness, density) to your mesh using components like “Thicken” or “Mesh Materiality” before exporting for printing.
5. Tips and Tricks:
- Experiment with different “MeshBrep” settings to find the balance between mesh quality, complexity, and processing time for your specific needs.
- Utilize preview functionalities within Grasshopper to visually inspect your mesh before exporting or further manipulation.
- Consider combining “MeshBrep” with other components like “Subdivide Surface” or “Weaverbird” for additional mesh editing and refinement options.
Remember, “MeshBrep” provides a powerful tool for converting your Voronoi diagrams into usable geometric forms. By understanding its parameters and exploring its potential, you can unlock numerous exciting design possibilities with Grasshopper Voronoi 3D.
What is the STL format in Grasshopper Voronoi 3D?
STL format, short for STereoLithography, is a widely used file format for storing 3D model geometry as triangulated meshes. In Grasshopper Voronoi 3D, the STL format plays a crucial role in exporting your generated designs for various purposes, including:
1. 3D Printing: This is the most common application of STL files in the context of Grasshopper Voronoi. By exporting your Voronoi-based mesh to STL, you can prepare it for printing on various 3D printers, allowing you to physically materialize your digital designs.
2. CNC Machining: Similar to 3D printing, STL files can be used to define the toolpaths for CNC machining, enabling you to translate your Voronoi patterns into physical objects using subtractive manufacturing techniques.
3. CAD Software Import: You can export your Voronoi mesh as an STL file to import it into various CAD software programs like Rhino, Fusion 360, or SolidWorks. This allows you to further refine the geometry, perform additional analysis, or integrate it into larger design projects.
4. Visualization and Rendering: Some rendering software accepts STL files for importing and visualizing your Voronoi models. While you might lose some detailed information compared to native formats, it can be a quick and easy way to create basic visualizations of your designs.
Limitations of STL in Grasshopper Voronoi:
- STL format only stores triangulated mesh data, meaning it loses information about curves, colors, textures, and other attributes associated with your original Grasshopper model.
- Due to its faceted nature, complex or organic Voronoi patterns might require a high mesh resolution to accurately capture their details in STL, potentially increasing file size and processing time.
Alternatives to STL:
Depending on your specific needs, other file formats like OBJ or STEP might offer advantages over STL:
- OBJ: Offers support for additional information like colors, textures, and vertex normals, but might not be universally supported by all software.
- STEP: A more robust format for exchanging complex CAD data, but not optimized for 3D printing and might require specific translators in some software.
Remember, the best format for exporting your Grasshopper Voronoi model depends on your intended use. Consider the limitations and strengths of each option to choose the one that best fits your workflow and desired application.
